Handling incoming quotes
This guide will take you through the entire process of claiming a new quote, preparing it, previewing it and sending it out to your client.
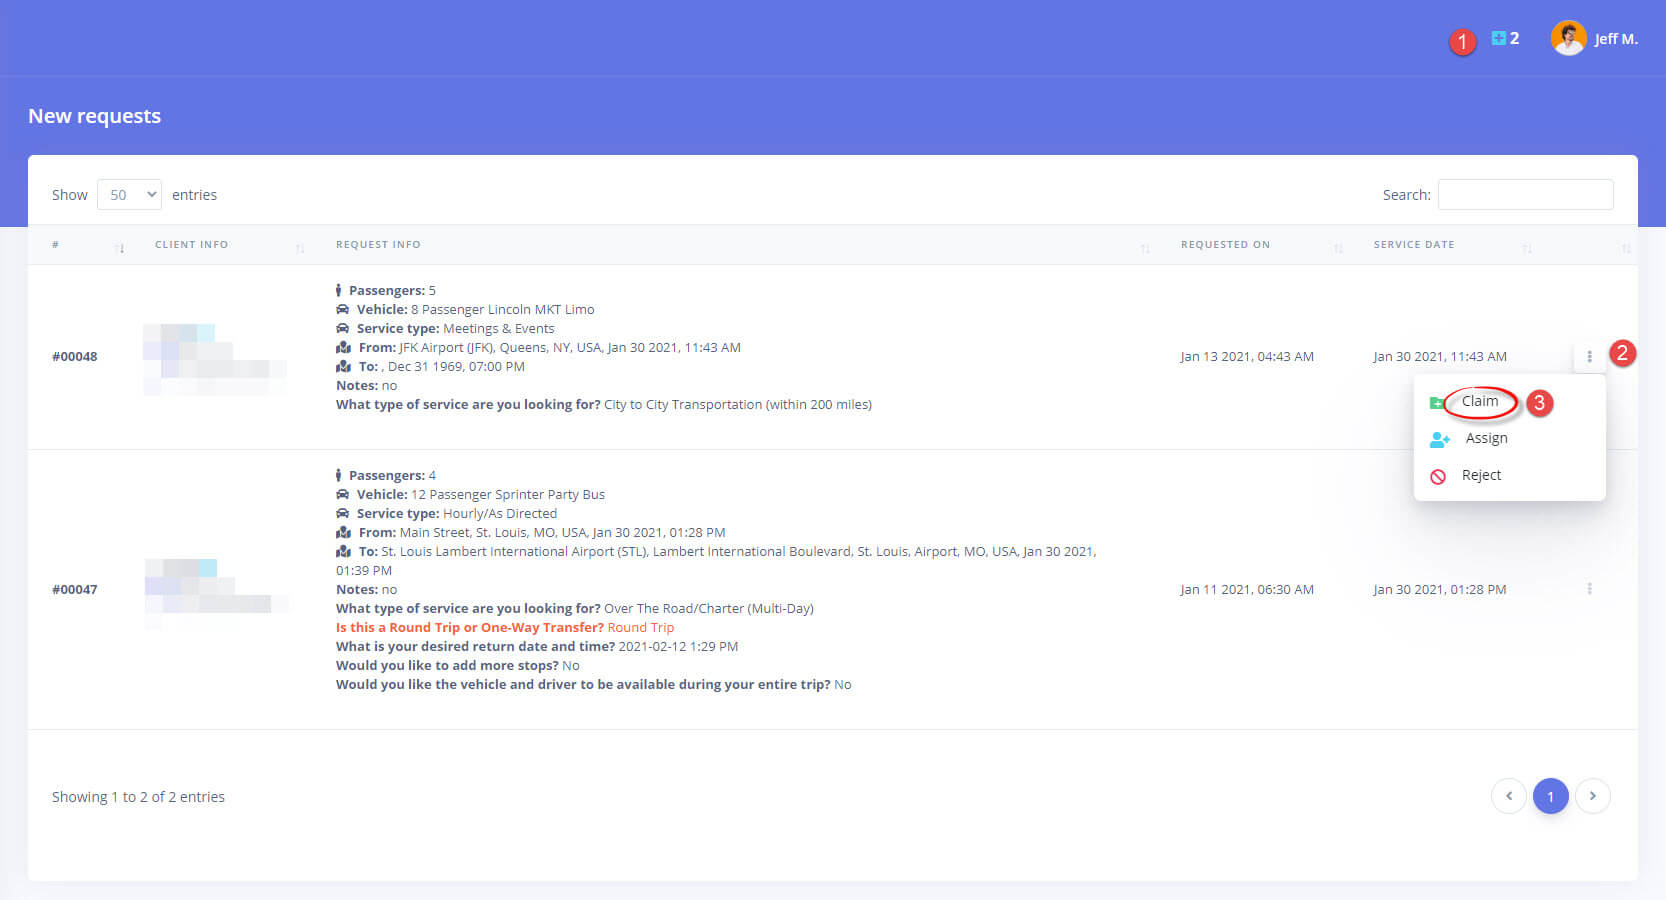
1. Claim your quote
Go to the new quotes page (only accessible if there are new quotes to be claimed) by clicking on the blinking notification at the top of the page (#1 in the screenshot below) then click on the three-dot menu icon (#2) for the quote you wish to claim and then click on claim (#3)
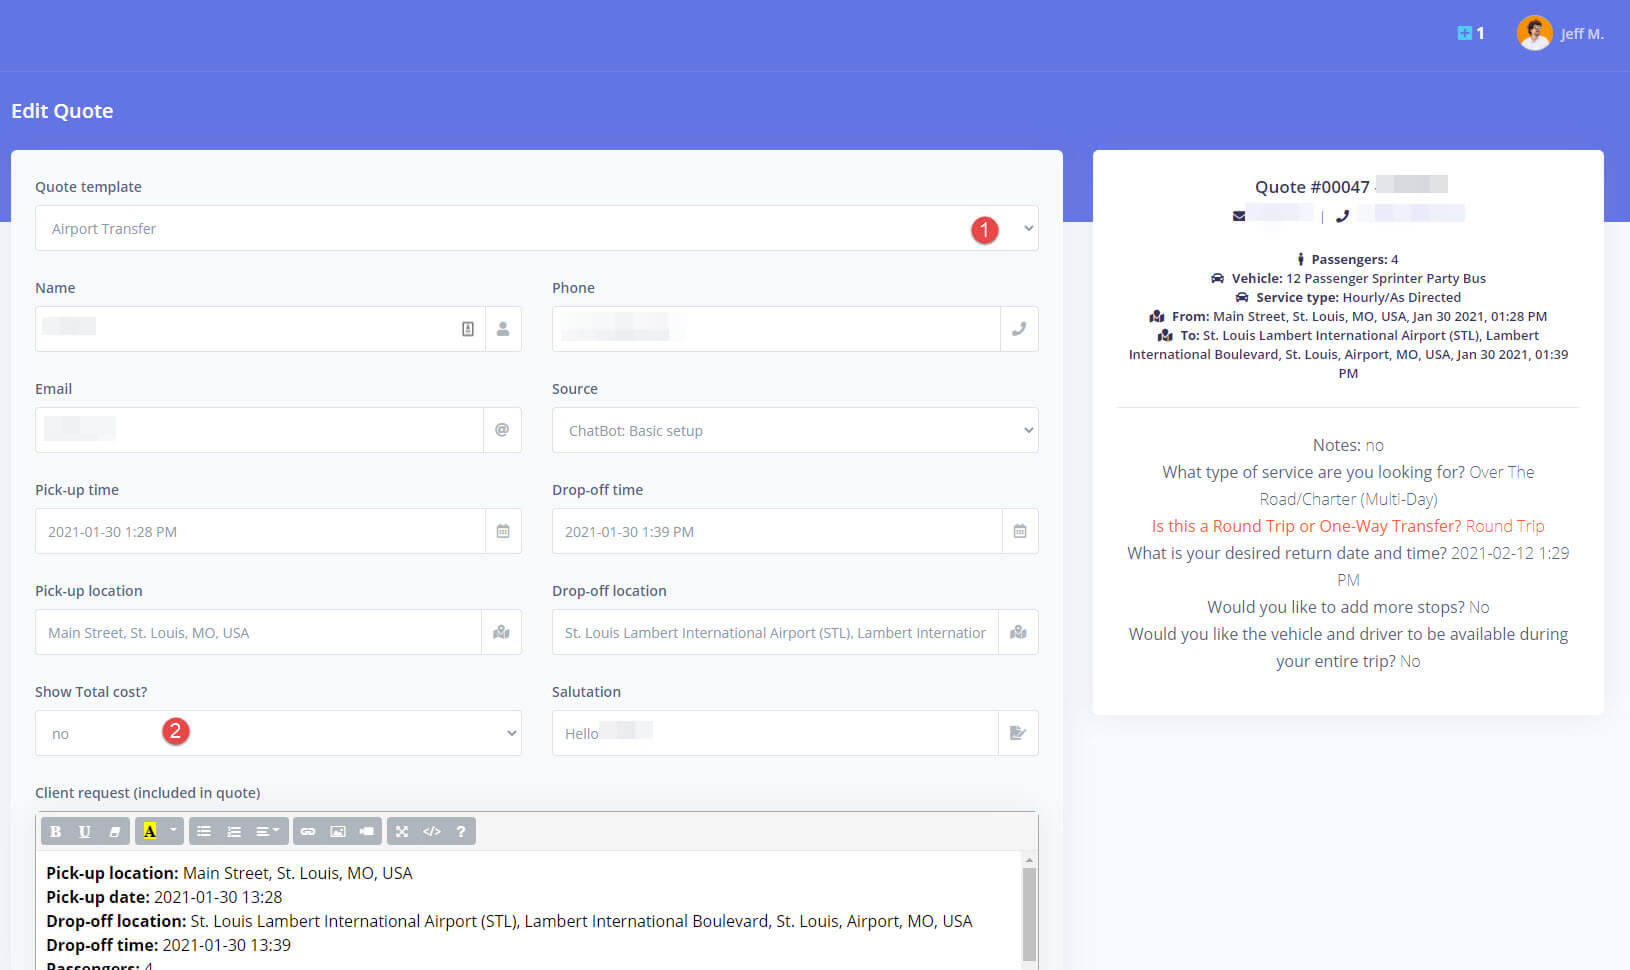
2. Prepare your quote
Once claimed, you are taken to the quote preparation page where you need to first validate the data and select the template (#1 in the screenshot below) to be used for the email. Once the template is selected, all you need to do is verify that the data in each field is valid, decide if you wish to include the total at the end of the quote (#2 in the screenshot) and edit the quote’s intro and ending if you consider necessary. Clicking Submit at the end of the form will take you to the next page where you can manage the quoted items.
3. Add quote items
In the 3rd step, you will need to select the items that you need to add to the quote. Both quote items and attachments.
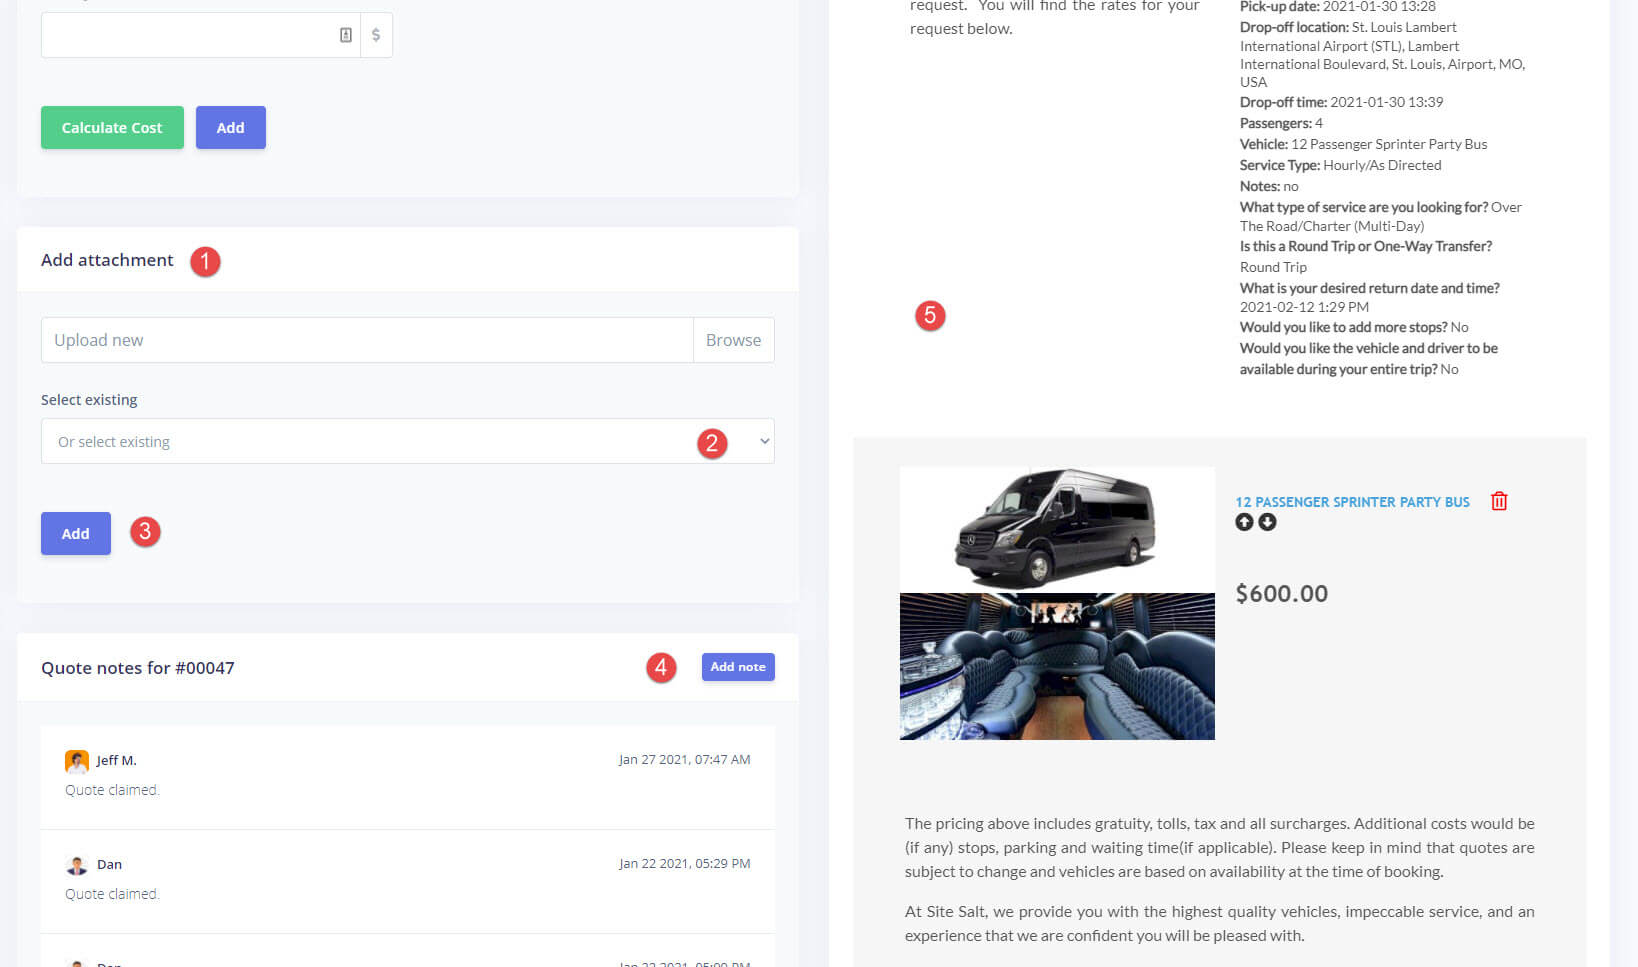
Looking at the screenshot below, Section (#1) is where you can add items to the quote. The entries from the “Vehicles” tab and the “Extra billable items” tab are available in the dropdown list and can be added to the quote. Once selected, make sure that the date fields are correct (please refer to the question mark icon for each field for further details on what each field is meant for) and click “Calculate Cost” which is marked with #2. The form will them try to estimate a cost based on your template and vehicle cost settings. You are not required to use the price that was estimated for you, instead, if you want to manually adust the cost, you may do so before adding the item to the quote. Once the cost was confirmed, all you need to do is hit the “Add” (#3) button and the item will be added to the quote.
(#4) To the right you will always have a live preview of what the quote looks like, as you edit it. You can always get to a full page preview, from the active quotes page if you need to.
(#5) will immediately send out the quote to the customer in its current state and (#6) will take you back to the previous step where you can edit the initial data for the quote.

4. Add attachments or notes
Further scrolling down on this page will take you to the Attachments form, highlighted with (#1) in the screenshot below where you can upload a file to be attached to the quote or you can select a previously attached file (#2) to be included in this quote. Please don’t forget to add (#3) the attachment to the quote once uploaded/selected.
(#4) allows you to add internal notes/comments if you need to, while (#5) continues to show the live quote preview to the right. Once you are happy with the quote, you may use the Send button, highlighted in the screenshot above.